When we start working with Java applications, the first step is downloading and installing the Java Development Kit (JDK). But what happens behind the scenes when we compile and run a Java program? Let’s break down the important components of Java that make it one of the most popular and platform-independent programming languages in the world.
1. Java Development Kit (JDK)
The JDK (Java Development Kit) is the complete toolkit that developers install when they begin working with Java.
✔️ It includes:
-
JRE (Java Runtime Environment)
-
Java Compiler (
javac) – compiles Java code into bytecode -
Java Command (
java) – runs Java applications -
Other essential tools for development and debugging
📌 Note: JDK versions are OS-specific. For example, Windows, Linux, and macOS each have their own JDK distributions.
2. Java Runtime Environment (JRE)
The JRE provides the libraries, Java Virtual Machine (JVM), and other components required to run Java applications.
Think of it as the execution environment for your compiled programs.
📌 A JVM is essentially an instance of the JRE.
3. Java Compiler (javac)
When you write a .java file and compile it:
The Java Compiler (javac) converts your code into bytecode (stored in .class files).
⚡ Key point:
-
Bytecode is not machine code.
-
It is platform-independent and can run on any OS with a JVM.
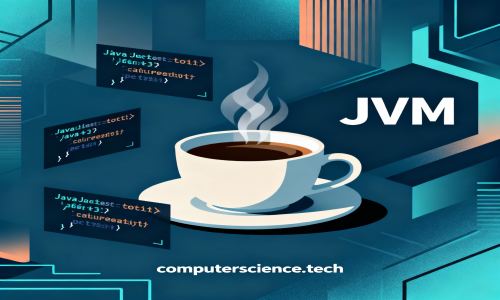
4. Java Virtual Machine (JVM)
The JVM is the heart of Java’s platform independence.
When you run your program:
-
The
javacommand launches the JVM. -
The JVM interprets bytecode and translates it into machine code that the underlying operating system understands.
✅ This is why you can compile Java code on Windows and then run the same .class file on Linux or macOS.
📌 Visual Representation:
5. Just-In-Time (JIT) Compiler
The JIT Compiler is a special component inside the JVM that makes execution faster and more optimized.
-
Instead of interpreting all bytecode at once, JIT compiles bytecode into native machine code in small chunks.
-
It also performs optimizations like inlining functions, which improves performance.
✔️ Default Behavior: JIT is enabled by default when you run a Java program.
❌ To disable JIT (for debugging):
6. Putting It All Together
Here’s how Java components work step by step:
-
Developer writes code →
MyApp.java -
Compiler (
javac) → converts toMyApp.class(bytecode) -
JVM launched with
javacommand → interprets bytecode -
JIT Compiler → optimizes execution into machine code
📌 Diagram:
🌟 Why These Components Matter
-
JDK → For development
-
JRE → For execution
-
JVM → For platform independence
-
JIT → For performance optimization
Together, these components make Java:
✅ Write Once, Run Anywhere
✅ Platform Independent
✅ Efficient and Optimized
✨ Final Thought:
When you hit compile and run in Java, you’re not just executing code—you’re leveraging a powerful system of compilers, runtimes, and optimizers that ensure your program runs seamlessly across multiple platforms.
Understanding Constructors in Java
When working with Java classes, one of the most fundamental concepts you’ll encounter is the constructor. But how is it different from other methods, and what special features does it offer? Let’s break it down.
What is a Constructor?
A constructor is a special method used to initialize the properties of an object when it is created.
-
Its name is always the same as the class name.
-
It does not have a return type (not even
void). -
It is automatically invoked when an object is created.
📌 Example:
Here, when you create an object:
The constructor runs automatically and initializes the object.
Constructor vs. Other Methods
-
Constructor → Invoked only once, at the time of object creation.
-
Other methods → Can be called multiple times, whenever needed.
-
Constructor name = Class name, while other methods have independent names like
start(),stop(), etc.
Invoking One Constructor from Another
Within the same class, you can call one constructor from another using the this() keyword.
📌 Example:
Here, the no-argument constructor calls the parameterized constructor.
Invoking Superclass Constructor
If a class extends another class, you can call the parent class constructor from the child class constructor using the super() keyword.
📌 Example:
✨ Key Takeaways
-
Constructors are special methods for object initialization.
-
They share the same name as the class and have no return type.
-
Use
this()to call another constructor in the same class. -
Use
super()to call a parent class constructor.Abstract Class vs Interface in Java – Key Differences
When designing Java applications, developers often need to define contracts and shared behaviors for classes. Two important tools for this are Abstract Classes and Interfaces. While both look similar at first glance, they serve different purposes. Let’s break it down.
Abstract Class
-
A class becomes abstract if it has at least one abstract method (a method without implementation).
-
Such a class must be declared with the
abstractkeyword. -
Any class extending an abstract class must provide implementations for all its abstract methods, otherwise it too must be declared abstract.
-
Abstract classes can have both abstract and concrete methods (methods with implementation).
-
A class can only extend one abstract class (single inheritance).
📌 Example:
Interface
-
In an interface, all methods are implicitly abstract (until Java 8, which introduced default and static methods).
-
A class that implements an interface must provide implementations for all its methods.
-
A class can implement multiple interfaces, allowing for multiple inheritance of type.
-
Interfaces are great for defining contracts that multiple, unrelated classes can follow.
📌 Example:
Key Differences at a Glance
Feature Abstract Class Interface Methods Can have both abstract & concrete methods All methods abstract (till Java 8) Multiple Inheritance Not possible (can only extend one class) Possible (can implement many interfaces) Variables Can have instance variables Only constants ( public static final)Use Case “Is-a” relationship with shared base logic “Can-do” contract for unrelated classes ✅ In short:
Use Abstract Class when you want to share code and enforce certain behaviors.
Use Interface when you just want to define a contract that multiple classes can implement.
💡 Why Multiple Inheritance Is Not Supported in Java
Java does not support multiple inheritance (i.e., a class inheriting from more than one class) to avoid ambiguity and complexity during method resolution.
Let’s understand why:
- Method AmbiguitySuppose we have two parent classes —
FatherandMother— both defining a method calledmoney().Now, if a child classRichConfusedKidextends both of them, the compiler won’t know whichmoney()method to call — the one fromFatheror fromMother.This ambiguity leads to compile-time errors. - The Diamond ProblemThe situation becomes even more complex in the classic diamond problem (common in C++).Imagine a
Grandparentclass also has amoney()method, and bothFatherandMotherinherit from it.WhenRichConfusedKidtries to accessmoney(), the compiler can’t determine which version of the method should be invoked — the one inherited throughFatheror throughMother.
To prevent such confusion and maintain simplicity and clarity in inheritance, Java allows a class to inherit from only one superclass, but it supports multiple inheritance of type using interfaces, which don’t cause these ambiguities since they contain only method declarations (no implementation conflicts).
-